


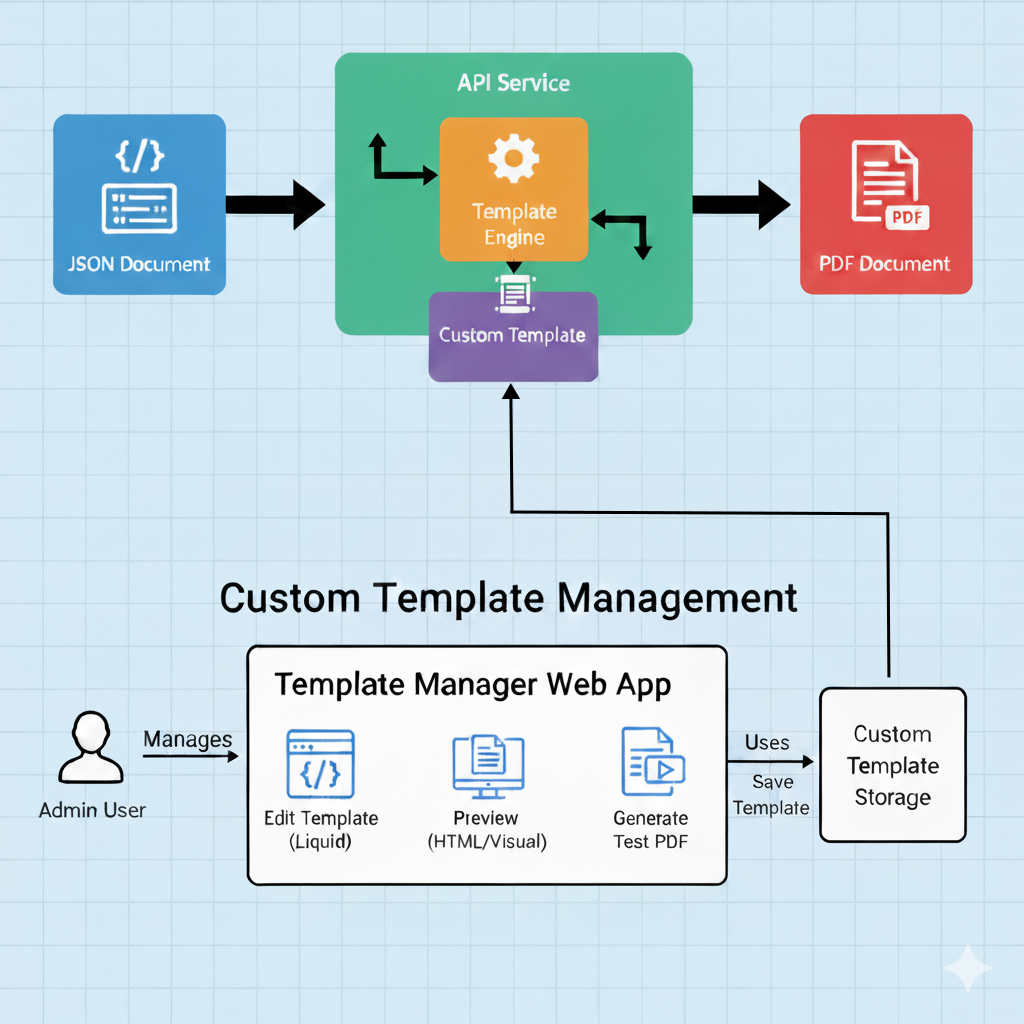
Are you looking to generate professional PDFs dynamically from your application? Rotativa.io’s template editor makes it easy to create, manage, and preview PDF templates using the powerful Liquid templating language. The Rotativa.io API will then serve your dynamic PDF documents, you’ll just need to send your data as a JSON document. In this guide, we’ll walk you through everything you need to know to get started.
Table of Contents
- Getting Started: Choosing Your Template
- The Template Editor Interface
- Writing Liquid Templates
- Working with Sample JSON Data
- Live Preview and Testing
- Managing Images
- Template Validation
- Managing Your Templates
- Using Templates via API
- Tips and Best Practices
Getting Started: Choosing Your Template
When you create a new template, you’ll be presented with several starter options to help you get up and running quickly:
Available Template Starters
- Blank - A minimal template with basic HTML structure, perfect for building from scratch
- Table - Pre-configured data table layout, ideal for reports and data presentations
- Invoice - Professional invoice template with line items, totals, and customer information
- Table with Cover Page - Multi-page template combining a cover page with data tables
Each template comes with:
- Pre-written Liquid markup
- Sample JSON data that matches the template structure
- A visual live preview
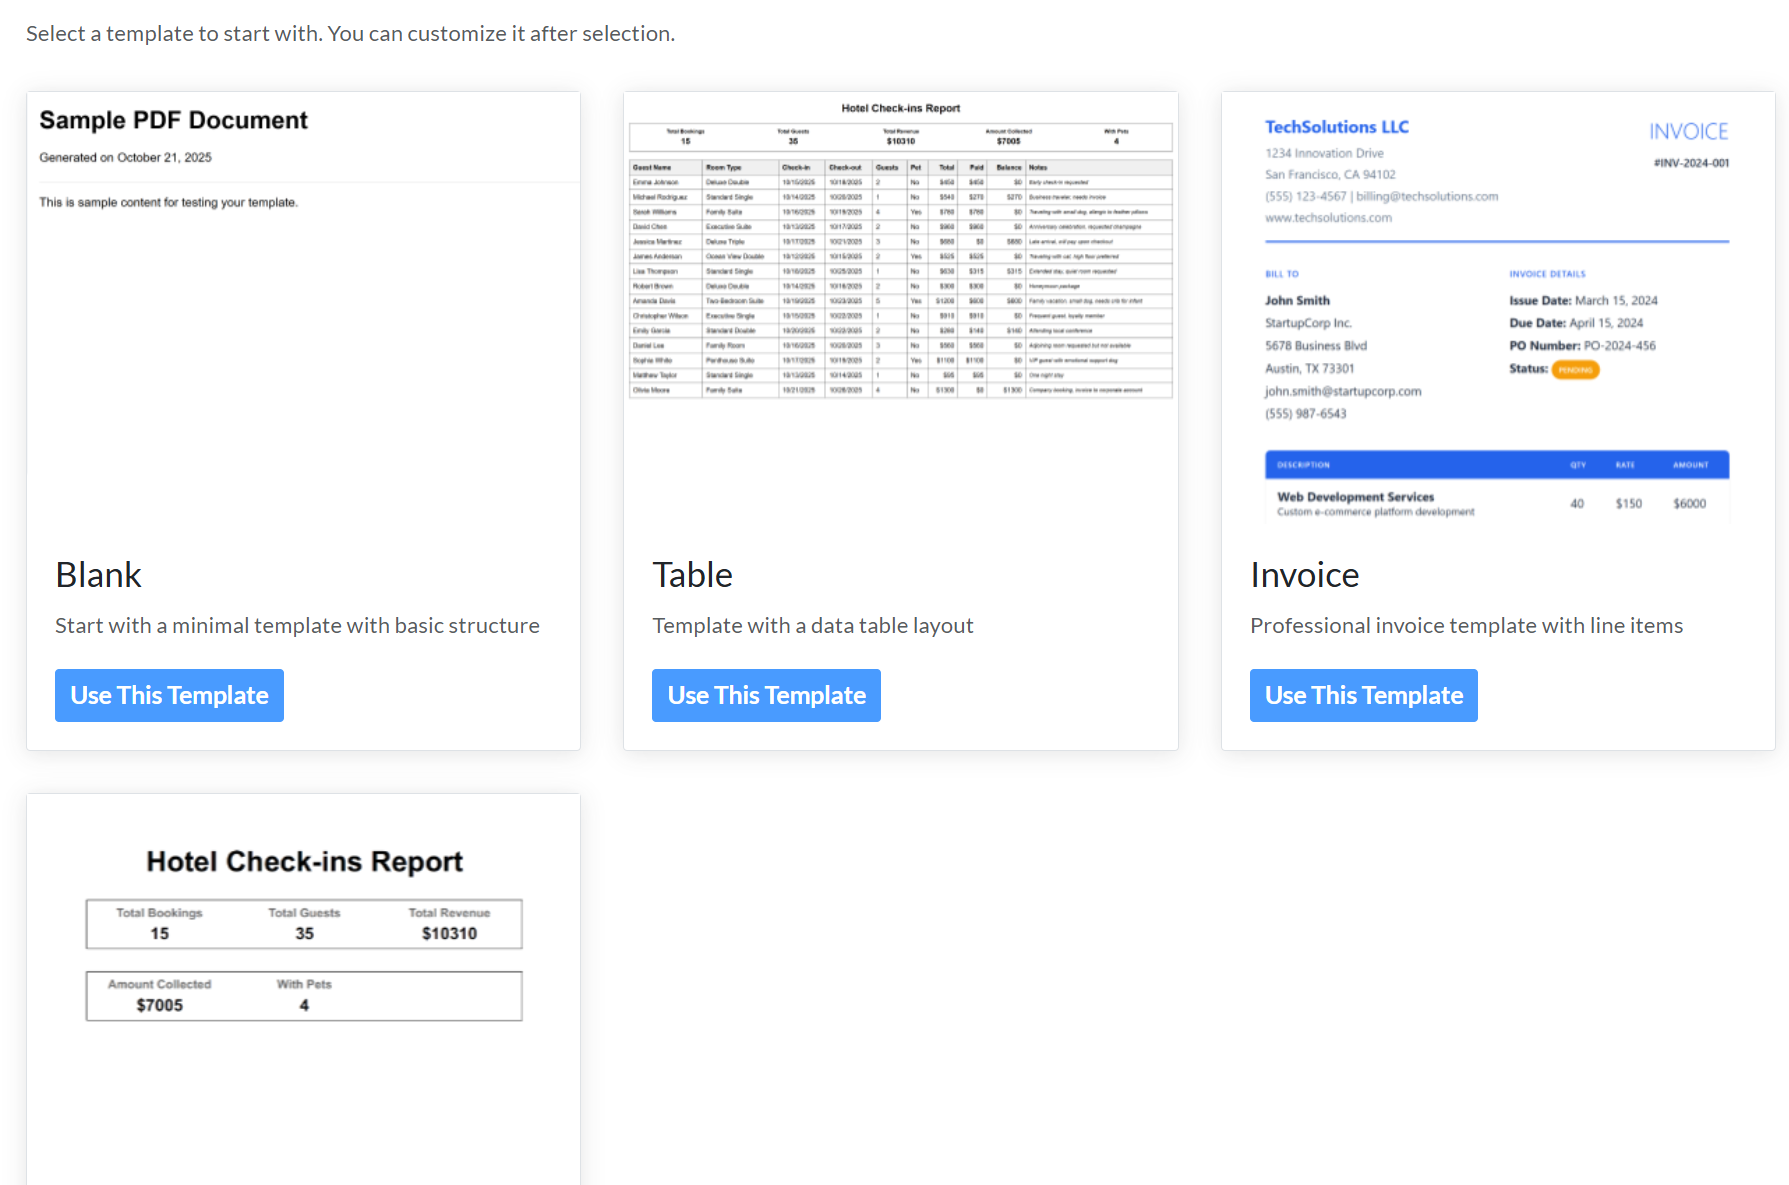
Simply click on any template card to start customizing it. Don’t worry - you can modify everything after selection!
The Template Editor Interface
The template editor is your command center for creating PDF templates. Here’s what you’ll find:
Top Action Bar
- Back to list - Return to the templates overview
- View Images - Quick access to your image library
- Preview PDF - Generate a real PDF preview with your current template
- Archive/Delete/Re-activate - Template lifecycle management
- Create/Update Template - Save your work
Editor Tabs

The editor provides three tabs for a complete development experience:
1. Template (Liquid)
This is where the magic happens! Write your HTML with Liquid template syntax. Features include:
- Syntax highlighting for Liquid tags
- Real-time validation with error underlining
- Smart autocomplete
- Line numbers and code folding
- Keyboard shortcuts (Ctrl+Shift+I to insert images)
2. Sample JSON Data
Provide test data in JSON format. This data will be used to render your template in the preview tab. Think of it as mock data that represents what your API will send when generating PDFs.
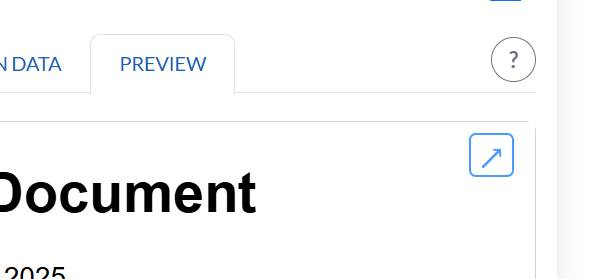
3. Preview
See your template rendered in real-time! The preview updates as you type, showing exactly how your PDF will look. You can even pop out the preview to a separate window for side-by-side editing.
Writing Liquid Templates
Liquid is a powerful templating language that makes it easy to create dynamic content. Here’s a quick primer:
Variable Output
<h1>Hello, {{ customer_name }}!</h1>
<p>Order Number: {{ order.number }}</p>
Conditional Logic
{% if order.total > 1000 %}
  <p class="vip-message">
    Thank you for your large order!
  </p>
{% endif %}
Loops
<table>
  <thead>
    <tr>
      <th>Product</th>
      <th>Quantity</th>
      <th>Price</th>
    </tr>
  </thead>
  <tbody>
    {% for item in order.items %}
    <tr>
      <td>{{ item.name }}</td>
      <td>{{ item.quantity }}</td>
      <td>${{ item.price }}</td>
    </tr>
    {% endfor %}
  </tbody>
</table>
Filters
<p>Ordered on: {{ order.date | date: "%B %d, %Y" }}</p>
<p>Total: {{ order.total | money }}</p>
Security Note
The template editor includes built-in security validation to prevent unsafe code patterns. You’ll see errors if you try to use potentially dangerous constructs.
Working with Sample JSON Data
The Sample JSON Data tab lets you provide test data for your template. This serves two important purposes:
- Testing - See how your template looks with real-world data structures
- Validation - The editor will warn you if you reference variables that don’t exist in your sample data
Example Sample JSON
{
  "customer_name": "John Smith",
  "company": "Acme Corporation",
  "order": {
    "number": "ORD-12345",
    "date": "2025-01-15",
    "total": 2450.00,
    "items": [
      {
        "name": "Widget A",
        "quantity": 10,
        "price": 120.00
      },
      {
        "name": "Widget B",
        "quantity": 5,
        "price": 250.00
      }
    ]
  }
}
Variable Validation
The editor will display warnings if you use template variables that aren’t defined in your sample JSON. This helps catch typos and missing data fields before you deploy to production.
Note: These are warnings, not errors - you can still save templates with undefined variables if those variables will be provided at runtime.
Live Preview and Testing
The Preview tab shows your template rendered with your sample JSON data in real-time.
Preview Features
- Live Updates - Changes appear instantly as you type
- Isolated Rendering - Preview is sandboxed to prevent CSS conflicts
- Pop-out Window - Click the ↗ button to open preview in a separate window
- Side-by-Side Editing - With pop-out enabled, edit and preview simultaneously
PDF Preview
Click the Preview PDF button in the top action bar to generate an actual PDF file. This shows exactly what your users will receive, including:
- Proper page breaks
- PDF-specific styling
- Print layout
- Font rendering
Managing Images
Need to include logos, charts, or product photos in your PDFs? The image management system makes it easy.
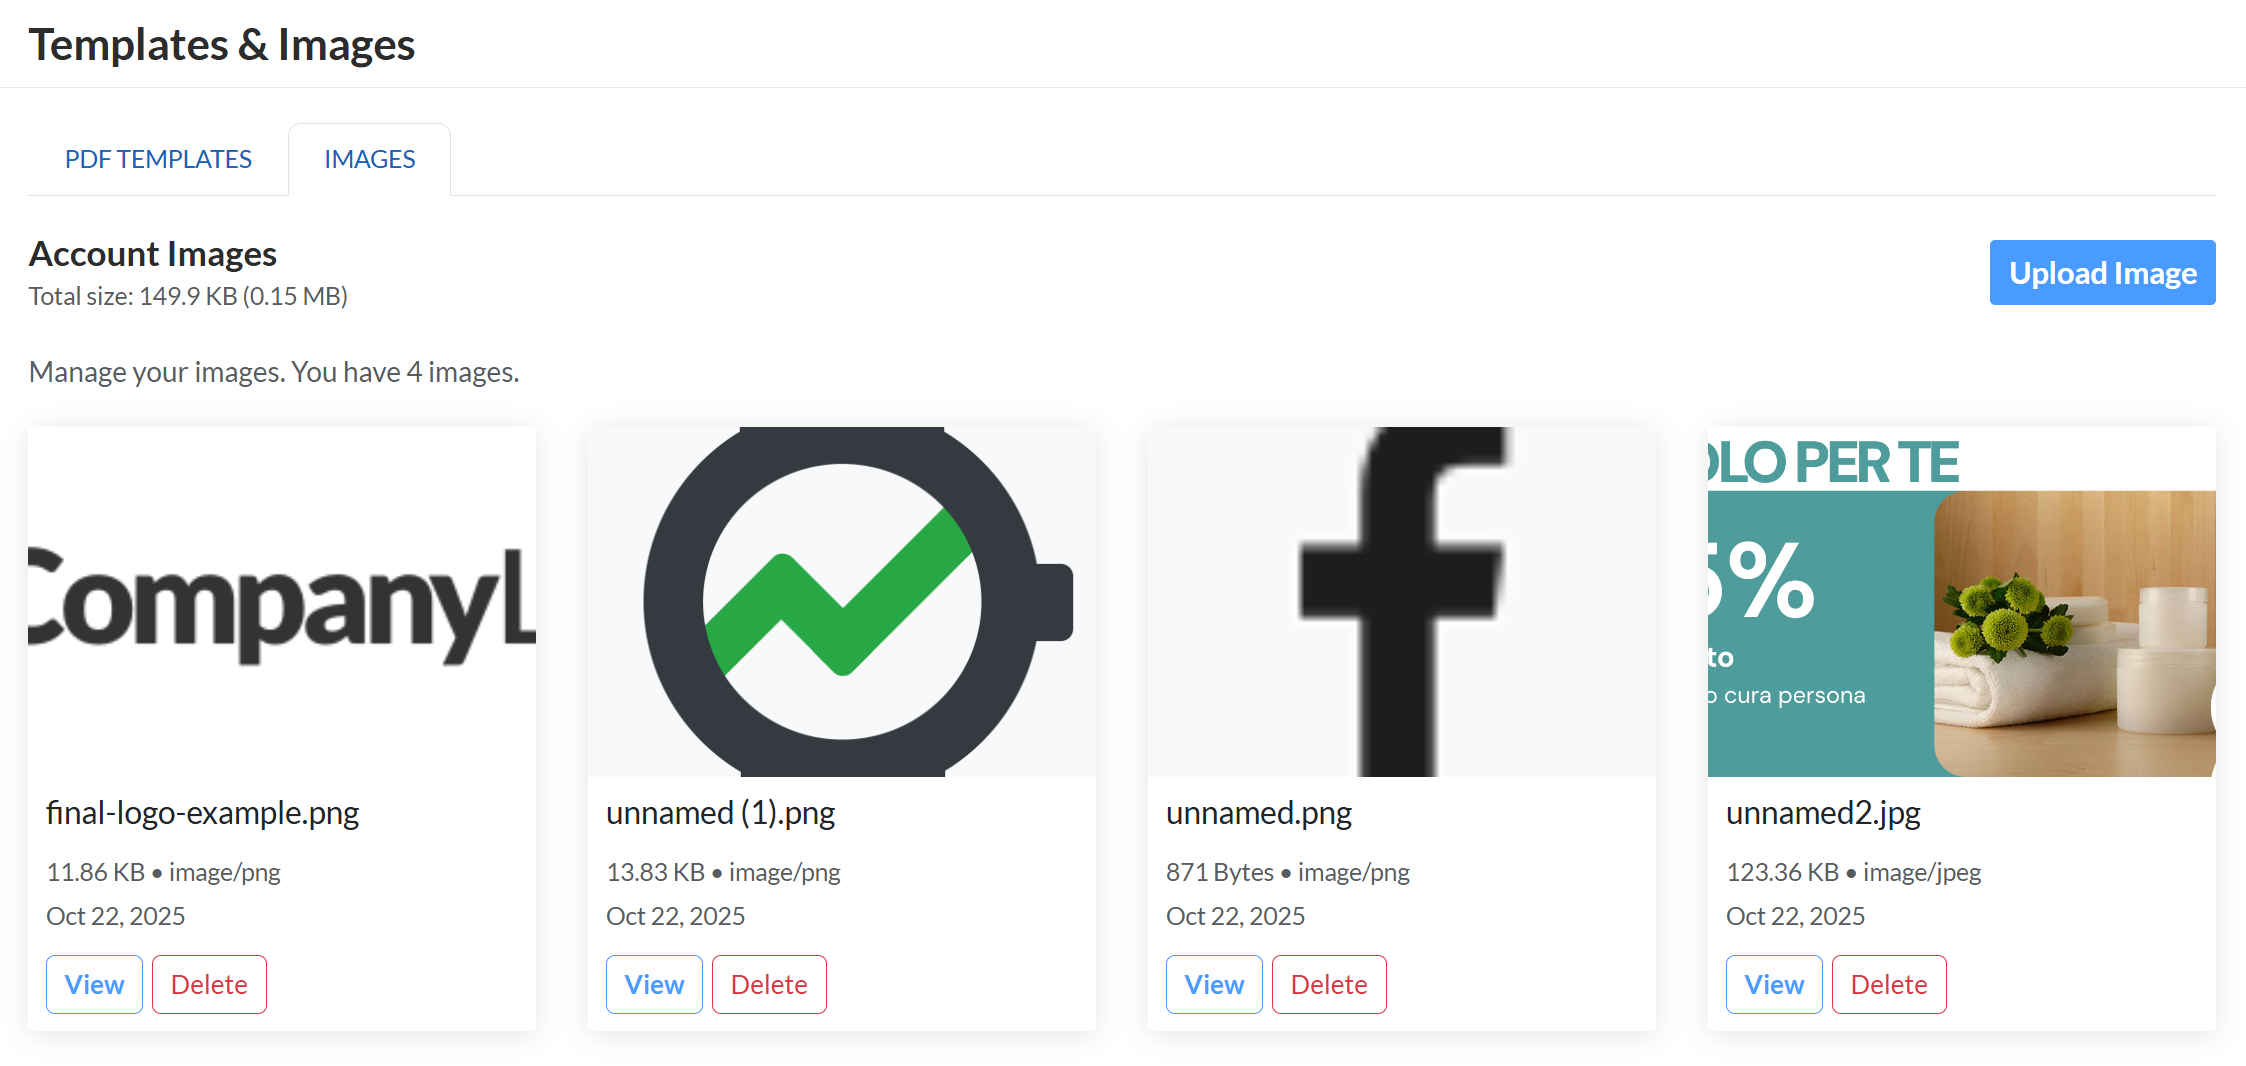
Accessing Images
Navigate to the Images tab on the Templates & Images page. Here you’ll see:
- All uploaded images with thumbnails
- File size and format information
- Total storage usage
- Last modified dates
Uploading Images
- Click Upload Image button
- Select an image file (JPG, PNG, GIF, BMP, SVG supported)
- Review the file details
- Click Upload
Your images are stored in your account’s storage and can be referenced in any template.
Using Images in Templates
There are two ways to insert images:
Method 1: Insert Image Helper
- Open the template editor
- Press Ctrl+Shift+I or use Command Palette (Ctrl+Shift+P) → “Insert image here”
- Select an image from the modal
- The HTML img tag is inserted at your cursor position
Method 2: Manual Reference
<img src="/templates//images/logo.png" alt="Company Logo" />
Image Best Practices
- Optimize images before uploading to reduce PDF file sizes
- Use descriptive filenames to make images easy to find
- Include alt text for accessibility
- Check total storage - keep an eye on your usage limits
Deleting Images
- Click the Delete button on any image card
- Confirm the deletion
- Warning: This action cannot be undone, and any templates referencing the image will break
Template Validation
The template editor includes sophisticated validation to catch errors before you save.
Error Types
Security Errors (Red/Blocking)
These prevent saving and indicate potentially dangerous code:
- Unsafe JavaScript patterns
- Script tag injection attempts
- File system access attempts
- Other security violations
Syntax Errors (Red/Blocking)
Invalid Liquid syntax:
- Unclosed tags (
{% if %}without{% endif %}) - Malformed expressions
- Invalid filter usage
Variable Warnings (Yellow/Non-blocking)
Variables used in template but not in sample JSON:
- Potential typos
- Missing data fields
- Runtime-provided variables (these are okay)
Validation Display
Errors and warnings appear in multiple places:
- Inline - Underlined directly in the code editor
- Tab Badge - Count of errors/warnings on the Template tab
- Alert Boxes - Detailed list below the editor with line/column numbers
- Save Button - Disabled with tooltip when errors exist
Managing Your Templates
Template Lifecycle
Templates can exist in two states:
Active Templates
- Available for PDF generation via API
- Shown by default in the template list
- Can be edited, duplicated, or archived
Archived Templates
- Not available for PDF generation
- Moved to archived storage
- Can be re-activated or permanently deleted
- Useful for templates you might need later
Template Actions
Saving Templates
- Edit your template, sample data, and template name
- Fix any validation errors
- Click Create Template (new) or Update Template (existing)
- Success notification appears
- Template is immediately available for use
Duplicating Templates
Need to create a variant of an existing template?
- Click Duplicate on any template in the list
- Template loads in editor with “ Copy” appended to name
- Modify as needed
- Save as new template
Archiving Templates
To remove a template from active use:
- Open the template in the editor
- Click Archive button
- Confirm the action
- Template moves to archived state and archived storage
Re-activating Templates
To bring an archived template back:
- Switch filter to “Archived” or “All”
- Open the archived template
- Click Re-activate
- Template returns to active state
Permanent Deletion
Warning: This cannot be undone!
- Template must be archived first
- Open the archived template
- Click Delete button
- Confirm the permanent deletion
- Template and all files are permanently removed
Filtering Templates
Use the status filter dropdown to view:
- Active - Only active templates (default)
- Archived - Only archived templates
- All - Both active and archived templates
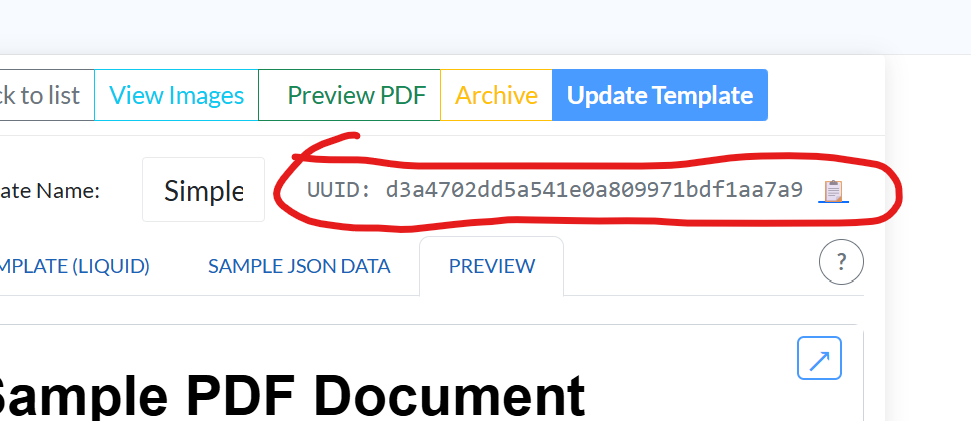
Template UUID
Each template has a unique UUID displayed in the editor. This is your template’s identifier for API calls. Click the 📋 icon to copy it to clipboard.
Using Templates via API
Once you’ve created and saved your templates in the dashboard, you can generate PDFs programmatically from your application using the Rotativa.io API. This section shows you how to integrate PDF generation into your code.
Authentication
All API requests require authentication via the X-ApiKey header.
Getting Your API Key
- Visit https://rotativa.io
- Sign up for a free account (if you haven’t already)
- Navigate to your dashboard to obtain your API key
- Keep your API key secure - treat it like a password!
API Endpoint
URL: POST /api/templateRender?templateId={templateId}
Endpoint: The closest to you choosing from:
useast.rotativa.ioeunorth.rotativa.ioausea.rotativa.io
Headers:
X-ApiKey: Your Rotativa.io API key (required)Content-Type:application/json
Query Parameters:
templateId: The UUID of your template (copy from the editor, or use the template name)
Request Body:
- JSON object containing the data to be rendered into the template
Response:
- Redirects to the generated PDF URL in Azure Blob Storage
- The PDF is accessible via a SAS (Shared Access Signature) URL
- Most HTTP clients follow redirects automatically
How It Works
- You create and save a template in the dashboard (e.g., “invoice-template”)
- Your application makes a POST request to
/api/templateRender?templateId=invoice-template - Your request body contains the JSON data to render (e.g., customer info, line items)
- Rotativa.io renders your template with the provided data
- The API returns a redirect to the generated PDF URL
- Your web app can return a HTTP redirect (302 code) to the PDF URl or it can download the PDF to display it, or email it
Code Examples
Here are complete working examples in popular programming languages:
C# (.NET)
using System;
using System.Net.Http;
using System.Text;
using System.Text.Json;
using System.Threading.Tasks;

public class RotativaClient
{
    private readonly HttpClient _httpClient;
    private readonly string _apiKey;
    private readonly string _baseUrl;

    public RotativaClient(string apiKey, string baseUrl = "https://useast.rotativa.io")
    {
        _apiKey = apiKey;
        _baseUrl = baseUrl;
        _httpClient = new HttpClient();
        _httpClient.DefaultRequestHeaders.Add("X-ApiKey", _apiKey);
    }

    public async Task<string> GeneratePdfFromTemplateAsync(string templateId, object data)
    {
        var jsonData = JsonSerializer.Serialize(data);
        var content = new StringContent(jsonData, Encoding.UTF8, "application/json");

        var response = await _httpClient.PostAsync(
            $"{_baseUrl}/api/templateRender?templateId={templateId}",
            content
        );

        response.EnsureSuccessStatusCode();

        // The response will be a redirect to the PDF URL
        return response.RequestMessage?.RequestUri?.ToString()
            ?? response.Headers.Location?.ToString()
            ?? throw new Exception("No PDF URL returned");
    }
}

// Usage Example
public class Program
{
    public static async Task Main()
    {
        var client = new RotativaClient("your-api-key-here");

        var invoiceData = new
        {
            invoiceNumber = "INV-2024-001",
            customerName = "John Doe",
            invoiceDate = DateTime.Now.ToString("yyyy-MM-dd"),
            total = 150.00,
            items = new[]
            {
                new { name = "Product A", quantity = 2, price = 50.00 },
                new { name = "Product B", quantity = 1, price = 50.00 }
            }
        };

        try
        {
            string pdfUrl = await client.GeneratePdfFromTemplateAsync("invoice-template", invoiceData);
            Console.WriteLine($"PDF generated: {pdfUrl}");
        }
        catch (Exception ex)
        {
            Console.WriteLine($"Error: {ex.Message}");
        }
    }
}
PHP
<?php

class RotativaClient {
    private $apiKey;
    private $baseUrl;

    public function __construct($apiKey, $baseUrl = 'https://useast.rotativa.io') {
        $this->apiKey = $apiKey;
        $this->baseUrl = $baseUrl;
    }

    public function generatePdfFromTemplate($templateId, $data) {
        $url = $this->baseUrl . '/api/templateRender?templateId=' . urlencode($templateId);

        $ch = curl_init($url);

        curl_setopt($ch, CURLOPT_POST, true);
        curl_setopt($ch, CURLOPT_POSTFIELDS, json_encode($data));
        curl_setopt($ch, CURLOPT_RETURNTRANSFER, true);
        curl_setopt($ch, CURLOPT_FOLLOWLOCATION, true);
        curl_setopt($ch, CURLOPT_HTTPHEADER, [
            'X-ApiKey: ' . $this->apiKey,
            'Content-Type: application/json'
        ]);

        $response = curl_exec($ch);
        $httpCode = curl_getinfo($ch, CURLINFO_HTTP_CODE);
        $finalUrl = curl_getinfo($ch, CURLINFO_EFFECTIVE_URL);

        curl_close($ch);

        if ($httpCode >= 200 && $httpCode < 300) {
            return $finalUrl;
        } else {
            throw new Exception("Error generating PDF. HTTP Code: $httpCode");
        }
    }
}

// Usage Example
$client = new RotativaClient('your-api-key-here');

$invoiceData = [
    'invoiceNumber' => 'INV-2024-001',
    'customerName' => 'John Doe',
    'invoiceDate' => date('Y-m-d'),
    'total' => 150.00,
    'items' => [
        ['name' => 'Product A', 'quantity' => 2, 'price' => 50.00],
        ['name' => 'Product B', 'quantity' => 1, 'price' => 50.00]
    ]
];

try {
    $pdfUrl = $client->generatePdfFromTemplate('invoice-template', $invoiceData);
    echo "PDF generated: $pdfUrl\n";
} catch (Exception $e) {
    echo "Error: " . $e->getMessage() . "\n";
}
?>
Python
import requests
import json
from datetime import datetime

class RotativaClient:
    def __init__(self, api_key, base_url='https://useast.rotativa.io'):
        self.api_key = api_key
        self.base_url = base_url
        self.session = requests.Session()
        self.session.headers.update({'X-ApiKey': api_key})

    def generate_pdf_from_template(self, template_id, data):
        url = f"{self.base_url}/api/templateRender"
        params = {'templateId': template_id}

        response = self.session.post(
            url,
            params=params,
            json=data,
            allow_redirects=True
        )

        response.raise_for_status()

        # Return the final URL after redirects
        return response.url

# Usage Example
if __name__ == '__main__':
    client = RotativaClient('your-api-key-here')

    invoice_data = {
        'invoiceNumber': 'INV-2024-001',
        'customerName': 'John Doe',
        'invoiceDate': datetime.now().strftime('%Y-%m-%d'),
        'total': 150.00,
        'items': [
            {'name': 'Product A', 'quantity': 2, 'price': 50.00},
            {'name': 'Product B', 'quantity': 1, 'price': 50.00}
        ]
    }

    try:
        pdf_url = client.generate_pdf_from_template('invoice-template', invoice_data)
        print(f"PDF generated: {pdf_url}")
    except Exception as e:
        print(f"Error: {str(e)}")
Node.js (JavaScript)
const axios = require('axios');

class RotativaClient {
    constructor(apiKey, baseUrl = 'https://useast.rotativa.io') {
        this.apiKey = apiKey;
        this.baseUrl = baseUrl;
        this.client = axios.create({
            baseURL: baseUrl,
            headers: {
                'X-ApiKey': apiKey,
                'Content-Type': 'application/json'
            },
            maxRedirects: 5
        });
    }

    async generatePdfFromTemplate(templateId, data) {
        try {
            const response = await this.client.post(
                '/api/templateRender',
                data,
                {
                    params: { templateId }
                }
            );

            // Return the final URL after redirects
            return response.request.res.responseUrl || response.config.url;
        } catch (error) {
            throw new Error(`Failed to generate PDF: ${error.message}`);
        }
    }
}

// Usage Example
(async () => {
    const client = new RotativaClient('your-api-key-here');

    const invoiceData = {
        invoiceNumber: 'INV-2024-001',
        customerName: 'John Doe',
        invoiceDate: new Date().toISOString().split('T')[0],
        total: 150.00,
        items: [
            { name: 'Product A', quantity: 2, price: 50.00 },
            { name: 'Product B', quantity: 1, price: 50.00 }
        ]
    };

    try {
        const pdfUrl = await client.generatePdfFromTemplate('invoice-template', invoiceData);
        console.log(`PDF generated: ${pdfUrl}`);
    } catch (error) {
        console.error(`Error: ${error.message}`);
    }
})();
Complete API Workflow Example
Let’s walk through a complete example of creating an invoice PDF:
- Create the template in the dashboard:
- Choose the “Invoice” starter template
- Customize the layout, add your logo, adjust styling
- Save it with the name “customer-invoice”
- Copy the template UUID from the editor
- Prepare your data in your application:
{ "invoiceNumber": "INV-2024-001", "customerName": "Acme Corporation", "customerAddress": "123 Main Street, Springfield", "invoiceDate": "2024-01-15", "dueDate": "2024-02-15", "items": [ { "description": "Web Development Services", "quantity": 40, "rate": 150.00, "amount": 6000.00 }, { "description": "Hosting (Annual)", "quantity": 1, "rate": 500.00, "amount": 500.00 } ], "subtotal": 6500.00, "tax": 650.00, "total": 7150.00 } - Make the API call:
- POST to
/api/templateRender?templateId=customer-invoice - Include your API key in the
X-ApiKeyheader - Send the JSON data in the request body
- POST to
- Receive the PDF URL:
- The API redirects to a URL like
https://storage.blob.core.windows.net/...?sas_token - This URL is valid for a limited time (check your account settings)
- Download the PDF or provide the link to your user
- The API redirects to a URL like
Error Handling
Proper error handling ensures your application gracefully handles failures.
Common HTTP Status Codes
- 200 OK - PDF generated successfully (redirect to PDF URL)
- 400 Bad Request - Missing or invalid templateId, or template not found
- 401 Unauthorized - Invalid or missing API key
- 404 Not Found - Template does not exist
- 500 Internal Server Error - Server error during PDF generation
Error Handling Best Practices
// C# Example
try
{
    string pdfUrl = await client.GeneratePdfFromTemplateAsync(templateId, data);
    // Success - use the PDF
}
catch (HttpRequestException ex) when (ex.StatusCode == System.Net.HttpStatusCode.Unauthorized)
{
    // API key is invalid or expired
    logger.LogError("Invalid API key. Please check your credentials.");
}
catch (HttpRequestException ex) when (ex.StatusCode == System.Net.HttpStatusCode.NotFound)
{
    // Template doesn't exist
    logger.LogError($"Template '{templateId}' not found.");
}
catch (HttpRequestException ex) when (ex.StatusCode == System.Net.HttpStatusCode.BadRequest)
{
    // Invalid request or data
    logger.LogError("Invalid request. Check template ID and data format.");
}
catch (Exception ex)
{
    // General error
    logger.LogError($"Failed to generate PDF: {ex.Message}");
}
API Important Notes
-
Template Identifiers: You can use either the template UUID or the template name as the
templateIdparameter. -
Image References: When your templates include images, they’re automatically served from your account storage at
/templates/{accountId}/images/{imageName}. No special handling needed! -
Response Format: The API returns a redirect (HTTP 302) to the generated PDF URL. Most HTTP clients follow redirects automatically, giving you the final PDF URL.
-
PDF URLs: Generated PDF URLs include a SAS (Shared Access Signature) token and are valid for a limited time. Download or cache PDFs if you need long-term access.
-
Rate Limits: Free accounts have usage limits. Monitor your dashboard for current usage. Upgrade your plan for higher limits.
- PDF Generation Engine: PDFs are generated using WeasyPrint, which provides excellent CSS support including:
- Flexbox and Grid layouts
- Custom fonts (via
@font-face) - Page breaks and print media queries
- CSS transforms and filters
- Best Practices:
- Cache generated PDFs when possible to reduce API calls
- Use template UUIDs for production (more stable than names)
- Validate your JSON data before sending to avoid errors
- Test templates thoroughly with edge cases
- Monitor API response times and set appropriate timeouts
Tips and Best Practices
Development Workflow
- Start with a sample - Use one of the provided starter templates
- Build incrementally - Add features one at a time and preview frequently
- Use sample JSON - Keep your test data realistic and comprehensive
- Test edge cases - What happens with empty arrays? Missing fields?
- Preview PDF early - Don’t wait until the end to generate a PDF
Template Organization
- Use descriptive names - “Customer Invoice Q1 2025” not “Template 3”
- Version templates - Create new versions instead of overwriting
- Document complex logic - Add HTML comments to explain tricky sections
- Archive old versions - Keep your template list clean
Performance Optimization
- Optimize images - Compress before uploading
- Minimize external resources - Embed critical CSS
- Test with realistic data - Use representative data volumes
- Avoid deep nesting - Keep your Liquid logic simple
Security Considerations
- Trust the validator - If it flags security issues, take them seriously
- Sanitize user input - Be careful with user-provided data in templates
- Test with malicious data - What if someone sends HTML in a field?
Unsaved Changes Protection
The editor protects you from accidental data loss:
- Yellow border appears when you have unsaved changes
- Browser warns before closing/refreshing
- Navigation is blocked until you save or discard changes
Keyboard Shortcuts
- Ctrl+S - Save template (browser default may override)
- Ctrl+Shift+I - Insert image
- Ctrl+Shift+P - Open command palette
- Ctrl+F - Find in template
- Ctrl+H - Find and replace
Conclusion
The Rotativa.io template editor provides everything you need to create professional, dynamic PDF templates. With features like live preview, validation, image management, and a powerful Liquid templating engine, you can build complex PDF documents with confidence. And with the simple REST API, you can integrate PDF generation into any application with just a few lines of code.
Quick Reference
Template Creation:
- Choose starter template → Customize in editor → Save
- Sample JSON provides test data and validates variable usage
- Live preview shows real-time rendering
- Upload images then insert with Ctrl+Shift+I
- Validation catches errors before you save
- Archive old templates instead of deleting
- Copy template UUID for API integration
API Integration:
- Authenticate with
X-ApiKeyheader - POST to
/api/templateRender?templateId={uuid} - Send JSON data in request body
- Receive PDF URL automatically
- Handle errors gracefully with proper status code checks
The Complete Workflow
- Design - Create templates in the visual editor with live preview
- Test - Validate with sample JSON data
- Save - Store templates in your account
- Integrate - Call the API from your application code
- Generate - Receive production-ready PDFs instantly
- Deliver - Download, display, or email PDFs to your users
Next Steps
Getting Started:
- Log in to your Rotativa.io dashboard
- Navigate to Templates & Images
- Click “Add Template”
- Choose a starter template
- Start customizing!
Going Live:
- Copy your template UUID from the editor
- Get your API key from the dashboard
- Integrate the API client code (see examples above)
- Test with real data
- Deploy to production!
Additional Resources
- Liquid Templating Syntax - Complete Liquid language reference
- Your Rotativa.io Dashboard - Monitor usage, manage templates, get support
- API Documentation - Additional endpoints and advanced features
Happy templating! If you run into any issues or have questions, check out our documentation or contact support at https://rotativa.io.